A Beginner’s Guide to Faxing Insurance Appeals and Grievances
Step-by-step guide to drafting, organizing, and HIPAA-compliant faxing of insurance appeals and grievances with timestamped delivery proof.
A Beginner’s Guide to Faxing Insurance Appeals and Grievances
When your insurance claim is denied or you have a complaint about your health plan, you can take action through an appeal or a grievance. Appeals challenge coverage decisions, while grievances address service-related issues like poor care or long wait times. Filing these can be critical, as external reviews overturn 40–70% of denials. Faxing remains a reliable method for submitting appeals due to its proof of delivery and compliance with deadlines, especially when paired with HIPAA-compliant services.
Key Takeaways:
- Appeals: Dispute coverage denials; often require clinical evidence and a detailed appeal letter.
- Grievances: Address non-coverage issues like service quality.
- Why Faxing Works: It provides delivery confirmation, meets insurer requirements, and ensures sensitive data security with HIPAA-compliant services.
- Letter Tips: Include your details, denial reason, supporting evidence, and a clear request for resolution.
- Document Organization: Use exhibits (e.g., Exhibit A) for attachments and reference them in your letter.
- Deadlines: Appeals must typically be filed within 180 days of denial or 72 hours for urgent cases.
Fax services like OneFaxNow offer pay-per-fax vs. subscription options with HIPAA compliance, real-time tracking, and no subscription requirements - ideal for secure, one-time submissions.
How to Structure an Insurance Appeal Letter
When it comes to challenging insurance denials, a well-organized appeal letter can make all the difference. The letter should present a clear, evidence-based case to counter the insurer's decision. According to the National Insurance Appeals Authority, the way you structure your appeal - along with the supporting evidence and references to regulations - plays a key role in whether the denial is overturned [2]. For ERISA plans, this letter serves as the final evidentiary record if the case escalates to federal court [2].
What to Include in Your Appeal Letter
An effective appeal letter should include specific components to give the insurer a clear reason to reconsider. Start with your identification details: your name, health ID, claim number, date of service, and policy number. Be sure to cite the insurer's exact denial reason as stated in your Explanation of Benefits (EOB) [2].
The main section of the letter should directly address the insurer's reasoning. For example, if the denial involves a claim of "lack of medical necessity", provide clinical guidelines such as InterQual or Milliman Care Guidelines to support your case. Include a Letter of Medical Necessity from your physician, outlining your diagnosis, treatment history, and why the denied service is essential [2][4][6]. If alternative treatments have been tried, include records showing they were unsuccessful or not appropriate [4].
Use the policy language from your Summary Plan Description (SPD) or Evidence of Coverage (EOC) to back up your argument, and reference applicable laws like ERISA § 503 or ACA § 2719 [2][4]. Attach all supporting documents - such as medical records, imaging results, and peer-reviewed studies - as numbered exhibits (e.g., Exhibit A, Exhibit B). Reference these exhibits in your letter to make your argument easy to follow [2]. Conclude with a clear remedy request, specifying whether you seek a full reversal, partial payment, or reconsideration under a different clause. Also, state your intent to pursue external review or other regulatory options if the internal appeal is denied [2].
Writing Tips for Clear, Professional Appeals
Maintain a professional and factual tone throughout your letter. Avoid emotional language or accusations, and stick to clinical evidence and contractual obligations. Use simple language to explain medical terms and organize your thoughts into concise paragraphs. To strengthen your case, cite peer-reviewed studies from sources like PubMed, particularly for treatments labeled as "experimental" [4].
Before submitting your appeal, request your claim file under ERISA. This includes all documents the insurer used to make its decision, such as internal notes and medical director opinions. Insurers are required to provide these records at no cost [4]. Keep a detailed log of every interaction, noting dates, representatives' names, and reference numbers [4][6]. Always submit copies of documents (not originals) and maintain your own detailed records [1].
Although millions of claims are denied each year, less than 1% are appealed - even though external reviews overturn 40–70% of denials [4]. A well-structured appeal letter, supported by robust clinical evidence, is your best chance at reversing a denial.
Once your letter is complete, the next step is to organize and attach your supporting documents in a clear, logical manner.
sbb-itb-0df24da
How to Organize Evidence for Your Appeal
What Evidence to Include
Once you've drafted a solid appeal letter, the next step is gathering and organizing the right evidence. Start with your Explanation of Benefits (EOB) to pinpoint the insurer's Reason and Remark Codes (CARC/RARC). These codes often explain why the claim was denied, such as "not medically necessary" or "missing information" [5].
Next, include a Letter of Medical Necessity (LMN) from your physician [4]. This should be backed by medical records like lab results, imaging reports, operative notes, and progress notes that clearly outline your condition's progression and current status [4]. If the insurer has suggested cheaper alternatives, provide records of failed alternatives to show that these options were ineffective or unsuitable. Include details about prior treatments, dosages, and outcomes to strengthen your case [4].
Cite peer-reviewed studies from reputable sources like PubMed, and include clinical practice guidelines from organizations such as the American Medical Association (AMA) or National Comprehensive Cancer Network (NCCN). These can help establish the treatment as a standard of care [4]. Reference specific language from your Summary Plan Description (SPD) or Evidence of Coverage (EOC) to connect your case to the insurer's own coverage definitions [4]. Lastly, keep a communication log that documents all interactions with the insurer, including dates, times, and names of representatives. This log creates a clear procedural history [1].
Once you've gathered all your supporting documents, it's time to organize them effectively.
How to Organize Your Attachments
How you present your evidence can make a big difference in how your appeal is reviewed. Label each document as an exhibit (e.g., Exhibit A, Exhibit B) and refer to these labels in your appeal letter [2]. This system makes it easier for reviewers to follow your argument.
Always use copies of your medical records and other documents when submitting to the insurance company. Keep the originals for your own records [1]. If you're faxing your appeal, combine your appeal letter, claim forms, and exhibits into a single PDF. This ensures all materials are reviewed together [3]. Highlight important sections in medical records or guidelines to draw attention to key points [2].
When handling Protected Health Information (PHI), such as treatment details or diagnoses, make sure all attachments are sent through a HIPAA-compliant fax service. Look for one that provides a Business Associate Agreement (BAA) and audit logs to ensure security and compliance, as previously mentioned [3].
Step-by-Step: How to Fax an Insurance Appeal
How to Fax an Insurance Appeal: Step-by-Step Process
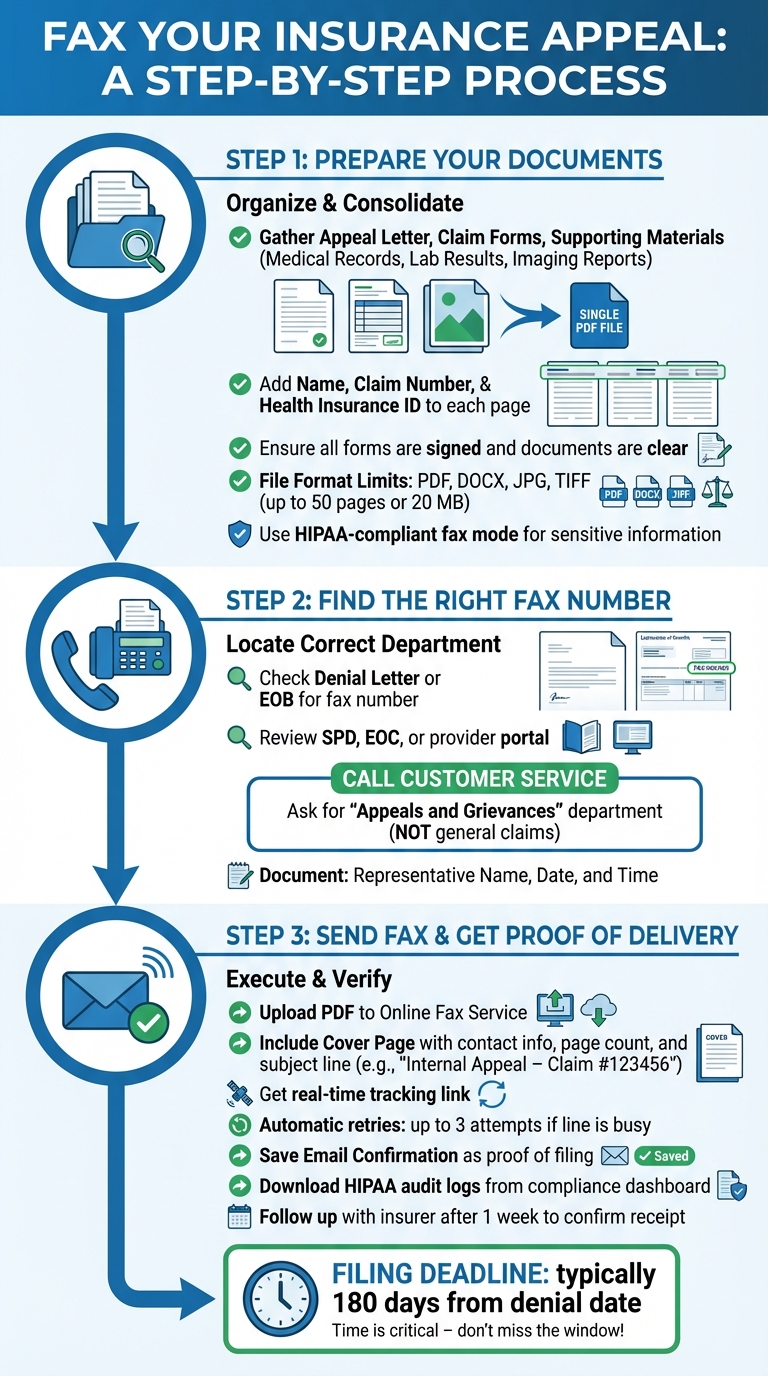
Preparing Your Documents for Faxing
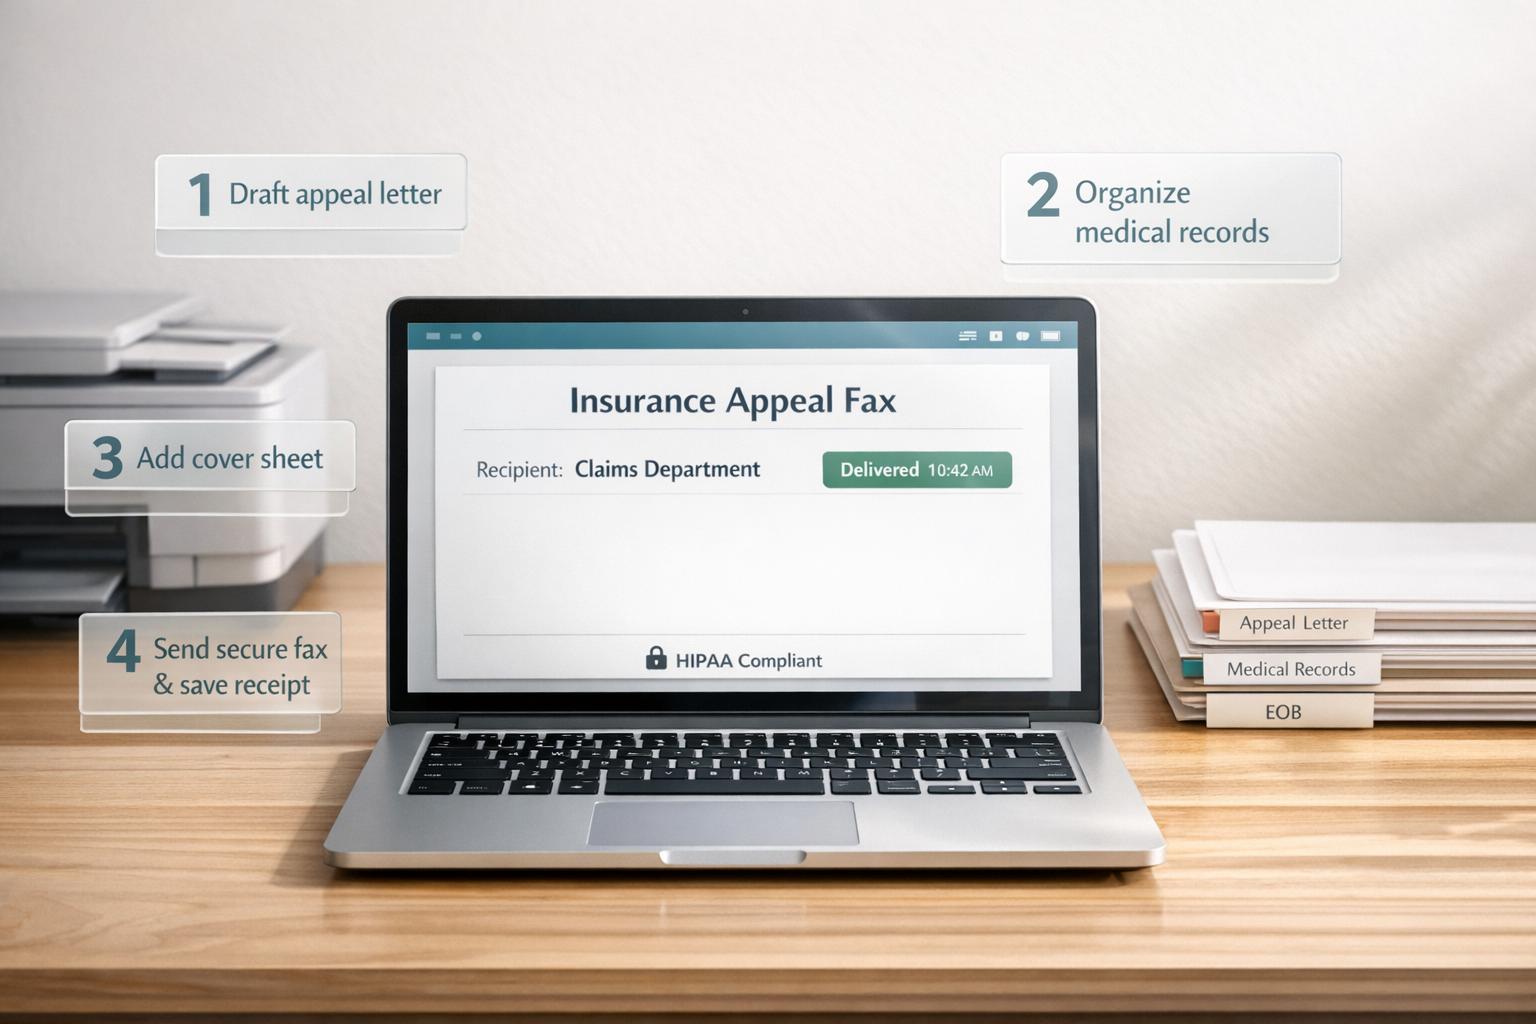
Start by organizing all the necessary documents for your appeal, including your appeal letter, claim forms, and supporting materials like medical records, lab results, or imaging reports. Combine these into a single, clearly ordered PDF file to ensure everything stays together during review [3].
Double-check that each page includes your name, claim number, and health insurance ID number [1]. Make sure all forms are signed and that scanned documents are clear and easy to read - blurry or incomplete pages can cause delays [3].
Most online fax services accept file formats such as PDF, DOCX, JPG, and TIFF, with limits typically set at around 50 pages or 20 MB total [3]. If your appeal contains sensitive information, like diagnoses or clinical notes, use a HIPAA-compliant fax mode. This ensures encrypted transmission and generates a Business Associate Agreement (BAA) for added security [3].
Once your PDF is finalized, confirm the correct fax number for submission.
Finding the Right Fax Number
The quickest way to find the fax number is by checking your denial letter or Explanation of Benefits (EOB). These documents often include specific instructions, such as the fax line for the appeals and grievances department. If it’s not listed, you can also consult your Summary Plan Description (SPD), Evidence of Coverage (EOC), or the insurer’s provider portal.
If you still can’t find the number, contact customer service and request the direct fax line for "Appeals and Grievances" - not the general claims department - to avoid unnecessary delays. Be sure to document the call by noting the representative’s name, date, and time [1].
Once you’ve confirmed the correct fax number, you’re ready to send your appeal and secure proof of delivery.
Sending the Fax and Keeping Proof of Delivery
When your documents are ready, upload your prepared PDF to your chosen online fax service. Include a cover page with your contact information, the total number of pages, and a concise subject line like "Internal Appeal – Claim #123456." Keep in mind that the cover page counts toward your total page limit [3].
After submission, most services provide a real-time tracking link to monitor the fax’s progress. If the insurer’s fax line is busy, the service will usually retry automatically, up to three times [3]. Once the fax goes through, you’ll receive an email confirmation - save this immediately as proof that you met the filing deadline, which is typically 180 days from the denial date [4].
For HIPAA-compliant transmissions, download detailed audit logs from your compliance dashboard. These audit logs provide a permanent record of submission and can be helpful if you need to escalate your appeal. Lastly, follow up with the insurer about a week after faxing to confirm receipt. Note the name and title of the person you speak with for your records [4].
Online Fax Services Compared for Insurance Appeals
Feature and Pricing Comparison
Once you've organized your appeal documents, choosing the right fax service is just as important to ensure timely delivery and HIPAA compliance. Fax services generally fall into two pricing categories: pay-per-fax and monthly subscriptions. Subscription services like eFax start at around $18.99 per month for up to 170 pages, which can work well if you send faxes regularly. But if you're a patient filing a single insurance appeal - or a small practice with occasional faxing needs - paying for unused months doesn't make sense.
Pay-per-fax services charge only when you send a fax. For example, OneFaxNow offers rates of $3.50 for 1–10 pages or $5.00 for 11–50 pages. If your appeal includes Protected Health Information (PHI) - such as medical records or lab results - you'll need to use their HIPAA mode. This option costs $6.50 for 1–10 pages or $10.00 for 11–50 pages and comes with immediate BAA (Business Associate Agreement) execution at checkout. By contrast, most subscription services only provide BAAs on higher-tier corporate plans, which often require additional onboarding.
OneFaxNow supports multiple file formats, including PDF, DOCX, TXT, JPG, PNG, and TIFF, with a limit of 50 pages or 20 MB per fax. Delivery tracking is included: you get a real-time status link, email updates, and automatic retries (up to three attempts) if the recipient's fax line is busy. Plus, payment is only processed after successful delivery. If all retries fail, the payment authorization is released, so you’re not charged for an unsuccessful fax.
| Feature | OneFaxNow (Pay-Per-Fax) | eFax (Subscription) |
|---|---|---|
| Pricing Model | $3.50–$10.00 per fax | ~$18.99/month (170 pages) |
| Account | No | Yes |
| HIPAA/BAA | Immediate BAA per fax | Only on Protect/Corporate tiers |
| Page Limit | Up to 50 pages per fax | 170–275 pages/month (plan dependent) |
| File Types | PDF, DOCX, TXT, JPG, PNG, TIFF | Email-to-fax and app uploads |
| Tracking | Real-time link and audit logs | Portal/app confirmations |
| Payment | Captured only on successful delivery | Monthly recurring charge |
This breakdown shows why OneFaxNow's pay-per-fax model, combined with instant HIPAA compliance, is a great fit for single, urgent appeals compared to subscription-based services.
Why OneFaxNow Works Well for Insurance Appeals
Insurance appeals are often time-sensitive, with deadlines like the typical 180-day filing limit. Proof of delivery is critical, and when your appeal includes sensitive materials like medical records, HIPAA compliance becomes non-negotiable. OneFaxNow simplifies this process by offering immediate HIPAA compliance without requiring a lengthy corporate contract.
With OneFaxNow's pay-per-fax model, you avoid committing to a recurring subscription for a one-time appeal. The instant BAA execution at checkout eliminates the hassle of extra compliance paperwork, while the HIPAA Audit Dashboard lets you export detailed logs as CSV or PDF, creating a clear and reliable paper trail. Features like automatic retries and payment processing only after successful delivery make sure your appeal gets where it needs to go, without unnecessary costs.
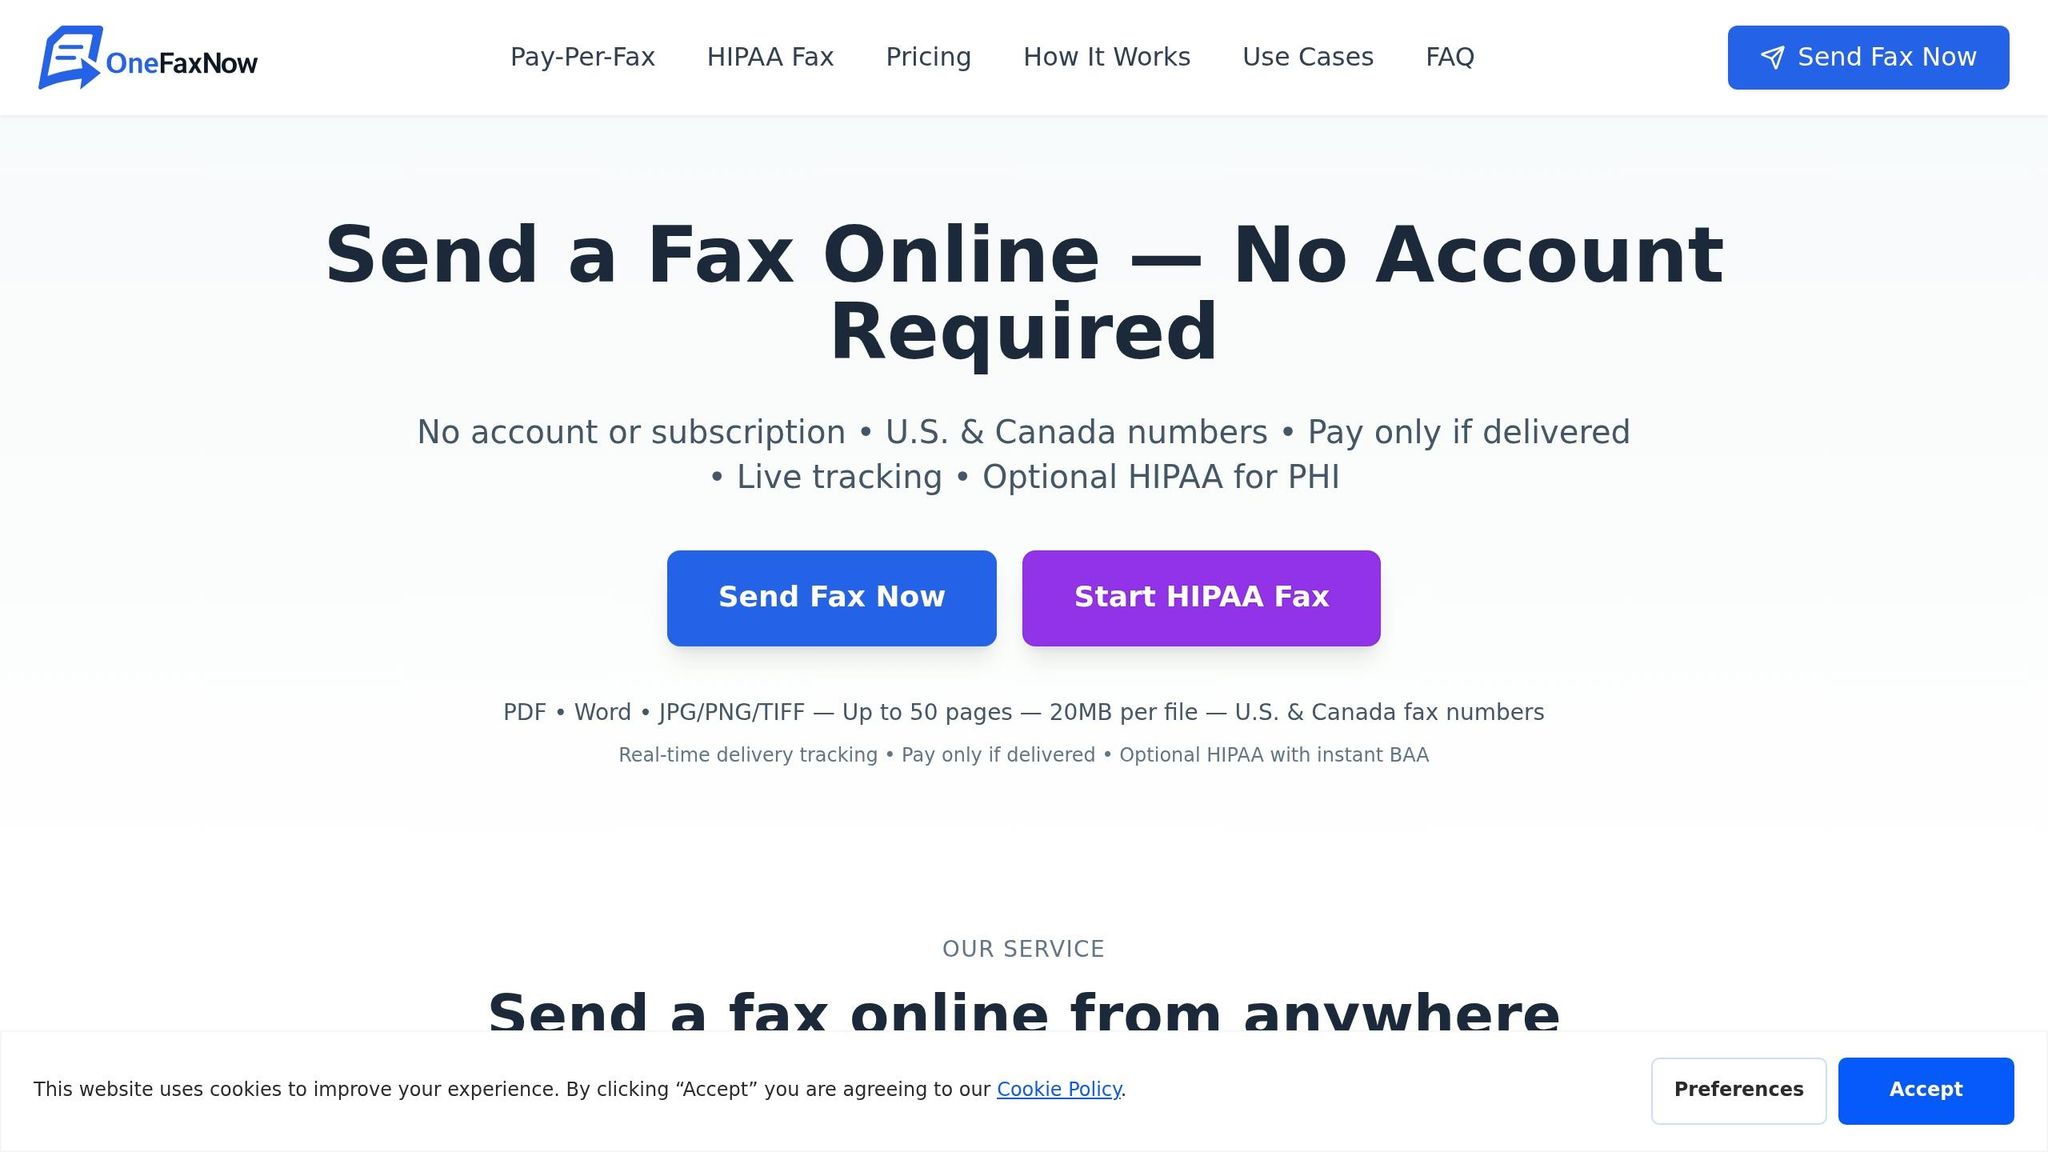
For patients, advocates, or small practices that handle occasional insurance grievances, OneFaxNow offers a combination of transparent pricing, no account requirement, real-time tracking, and immediate HIPAA compliance. It’s a practical, efficient solution for ensuring your appeal is delivered securely and on time. Send a Fax Online - No Account Required or explore more about HIPAA-compliant faxing for insurance claims. Try it today and experience the ease of secure faxing.
Conclusion
To effectively counter a claim denial, start by reviewing your denial notice carefully and gathering strong clinical evidence. Identify the specific reason code behind the denial, then compile a detailed appeal package. This should include a letter from your physician, relevant medical records, and clinical guidelines that support the medical necessity of the claim. Your appeal letter should clearly request a reversal, reference your claim number, and provide a point-by-point rebuttal addressing the denial reason. While fewer than 1% of denied claims are appealed, independent external reviews overturn denials 40% to 70% of the time [4]. Ensuring your appeal is properly submitted gives you a real chance to challenge the decision.
Once your appeal letter and evidence are ready, the next step is submission. Proof of delivery is essential, as most insurers require internal appeals to be filed within 180 days of the denial notice [1]. Faxing is an effective option because it provides an immediate transmission record. If your appeal includes Protected Health Information, make sure to use a HIPAA-compliant fax service that guarantees secure transmission and provides an instant Business Associate Agreement (BAA).
OneFaxNow offers a straightforward, pay-per-fax solution that is ideal for appeals. Pricing starts at $6.50 for 1–10 pages or $10.00 for 11–50 pages in HIPAA Mode. There’s no need to set up an account, and the service provides instant BAA execution, real-time tracking, and delivery confirmation. The HIPAA Audit Dashboard also allows you to export logs, ensuring you can verify timely filing for external reviews. This service is perfect for patients, advocates, and small practices needing a secure, one-time fax option for appeals.
Simplify your appeal process with a reliable fax solution. With OneFaxNow, you can ensure your appeal is delivered securely and on time. Send a Fax Online - No Account Required or explore more about HIPAA-compliant faxing for insurance claims.
FAQs
What should I do if my appeal deadline is sooner than 180 days?
If your appeal deadline is less than 180 days away, you can request an expedited appeal for a quicker review. Be sure to clearly outline the urgency and any potential health risks in your appeal letter or form. Many insurance providers, including Medicare and the Health Insurance Marketplace, have processes in place for handling urgent appeals. Review your insurer’s specific guidelines and act swiftly to ensure you meet the shorter timeline.
How can I prove the insurer received my faxed appeal on time?
You can show that the insurer received your faxed appeal on time by holding onto a timestamped fax confirmation receipt. This receipt acts as a solid, unalterable record of when the fax was sent and delivered, giving you dependable evidence for your documentation.
What’s the best way to fax more than 50 pages of appeal documents?
The most efficient way to fax over 50 pages of appeal documents is by using a pay-per-fax service like OneFaxNow. This service handles large file sizes, guarantees quick delivery, and offers a timestamped receipt as proof of delivery - crucial for staying compliant and keeping a dependable record.